WALLPAPER TOOLS
WALL NEEDS TO BE IN GOOD CONDITIONS, CLEAN, DRY, NO CRACKING PAINT, FREE OF MOLD, GREASE OR STAINS.
Make sure you are installing a material suitable for your wall.
Hanging wallpaper is a two people project. For best results start and finish installation in a single session, don’t leave the project unfinished for next day. Reserve 1 hour per panel to install.


The wall needs to be painted, clean, dry, and in good conditions. Avoid installing on cracking paint, walls with mold, grease, or stains.
Hanging wallpaper is a two people project. For best results start and finish installation in a single session, don’t leave the project unfinished for the next day. Reserve 1 hour per panel to install. Paper shrinks as it dries, completing the task in a single session will ensure a seamless match of your pattern.

We recommend using paint finishes like Sateen or Gloss.
Matte or Flat finishes are more rough so paints tend to lift off the wall when wallpaper is removed.
GOT TEXTURED WALLS?
PEEL AND STICK wallpapers are NOT SAFE on textured or damaged walls. A textured wall is any wall that is not perfectly and totally smooth and without imperfections. Decorative wall finishings with the presence of irregularities on the surface of the wall is considered texture.
Use only our Long Term Peel and Stick when you have mild texture on your wall.

BEFORE YOU START
- Unpack and check your order upon receiving it, even if you won’t install it right away.
- Check color consistency and panel match or pattern repeat throughout your order always before installing.
- Never install your wallpaper if you think it has a defect or flaw. Contact us first.
- Start from left to right when possible.
- Murals: install in numerical roll sequence starting with the lowest number (1) in left to right orientation.
How to install Peel and Stick Video
Step By Step
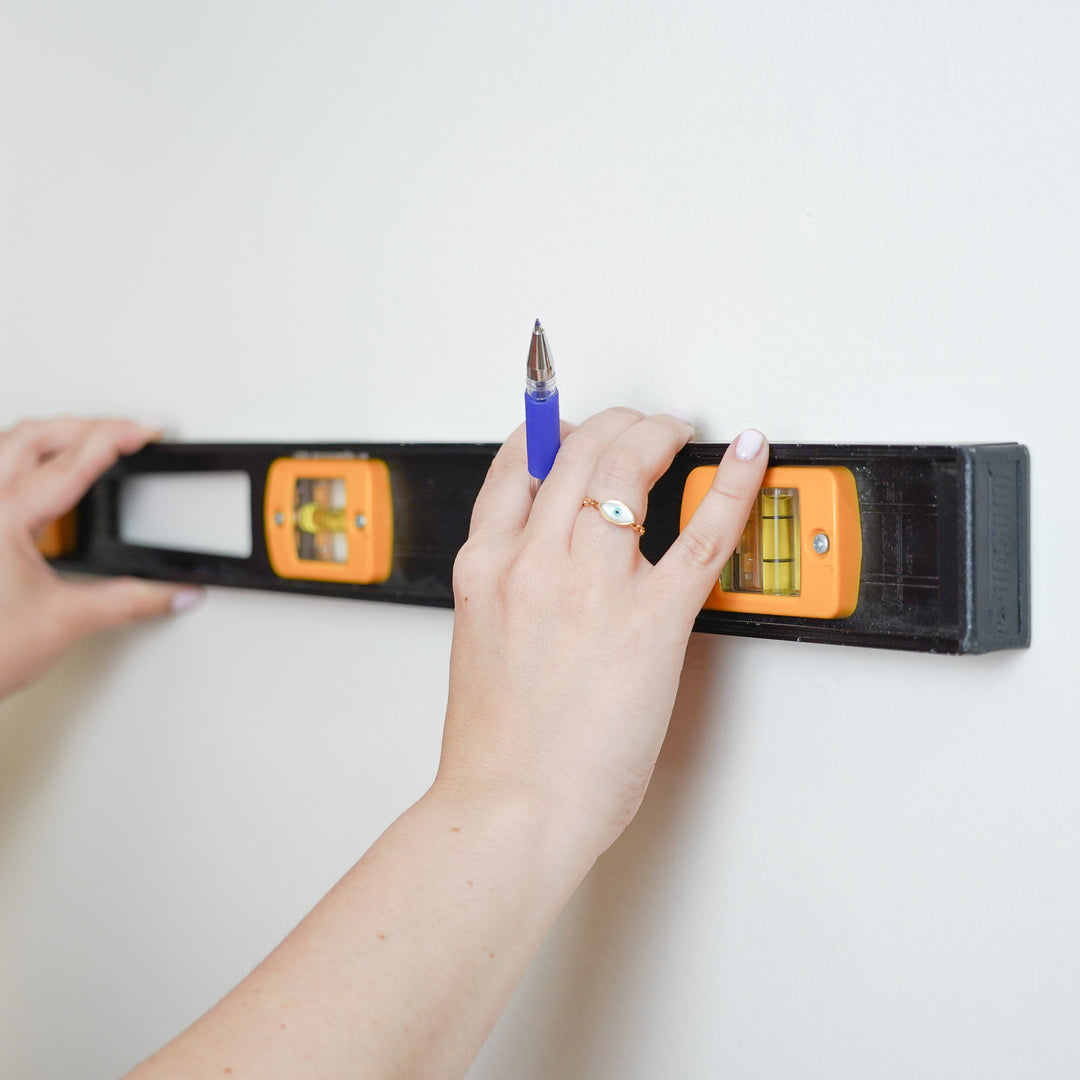
STEP 1: MEASURE YOUR PANEL
Measure the width of your wallpaper panel. On the wall beginning on the left side, measure out the width of the wallpaper panel and draw a mark.
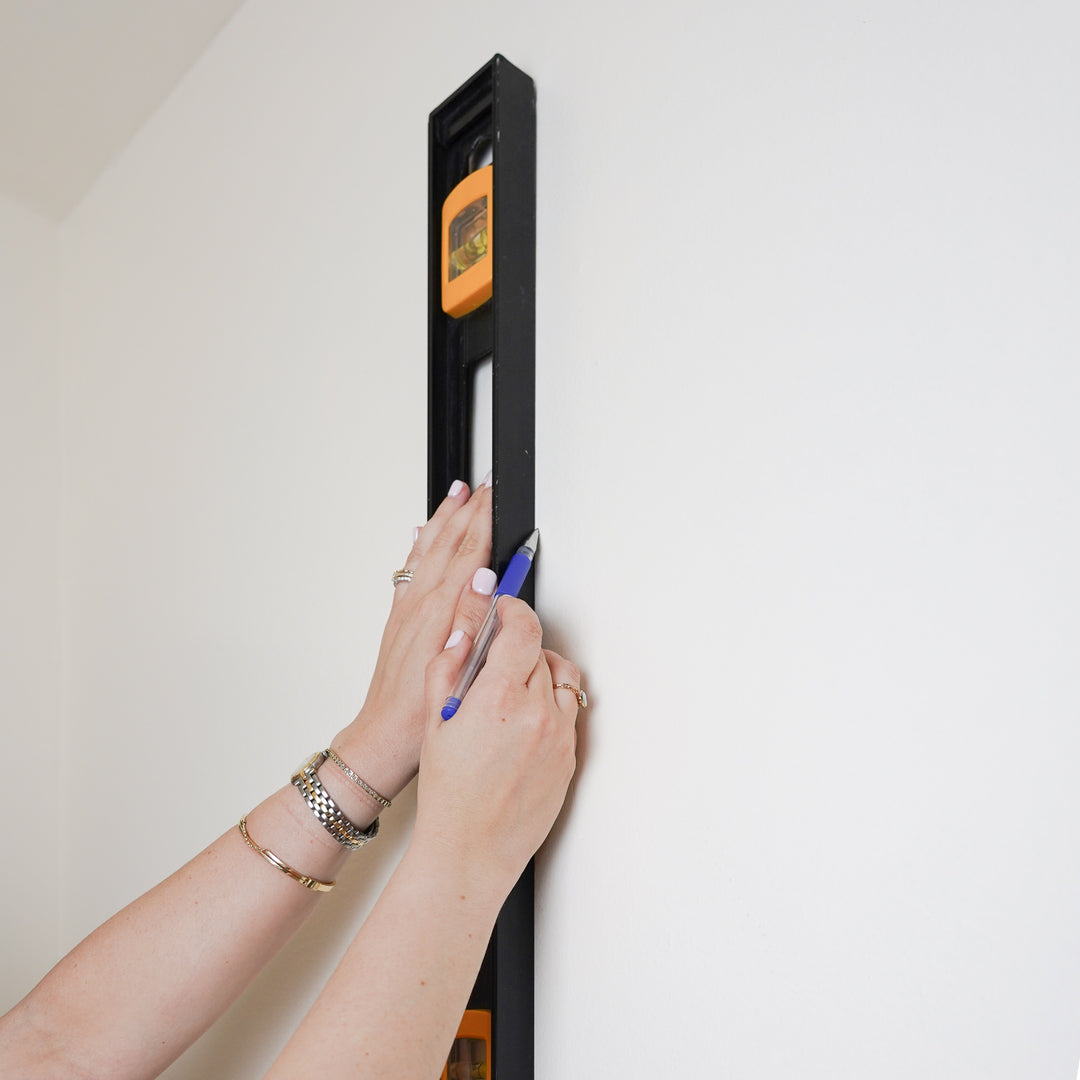
STEP 2: DRAW THE GUIDE LINE
From the mark draw a vertical line ceiling to floor. This is the Guide Line for your first panel. Never align a wallpaper to a corner or ceiling since might be uneven.
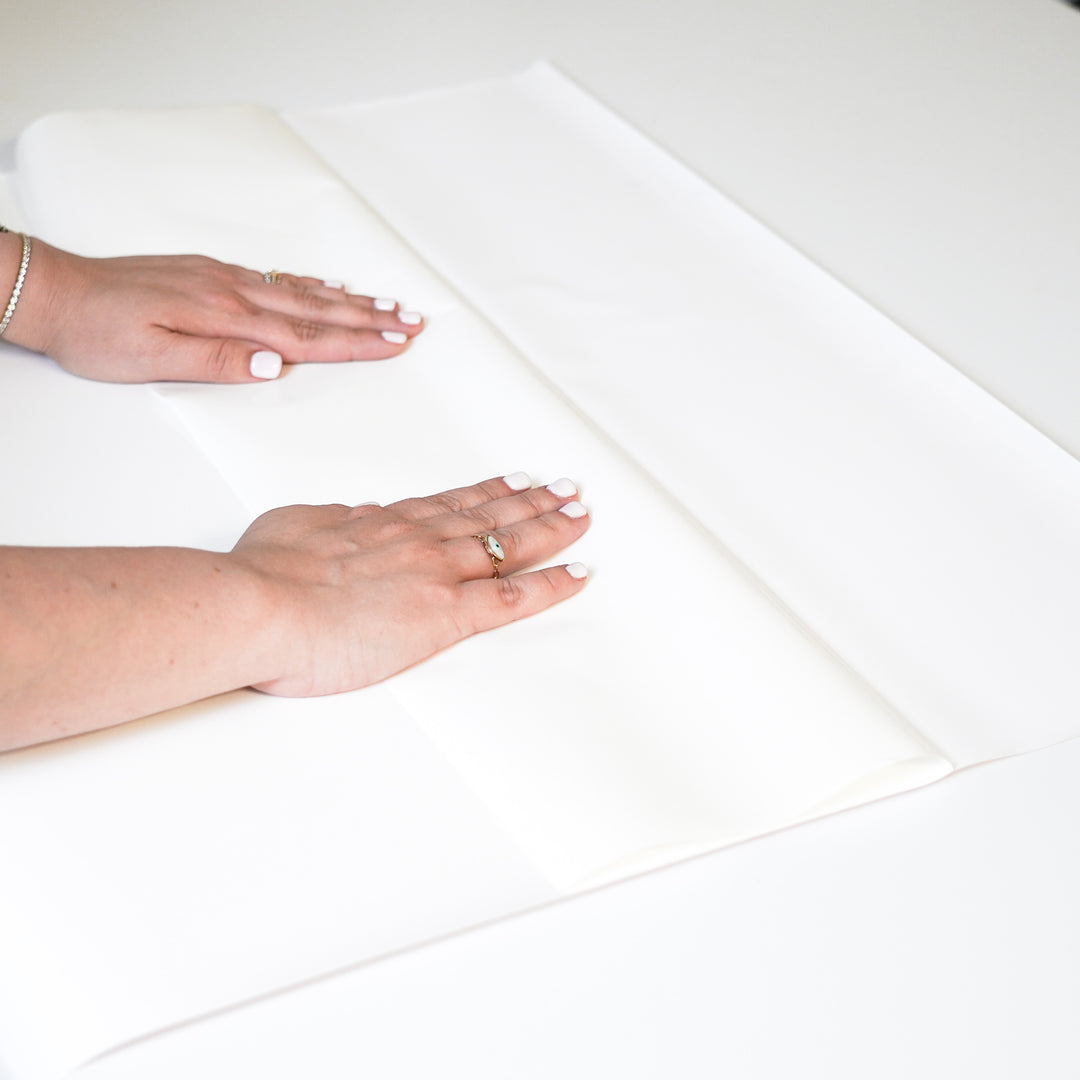
STEP 3: PEEL THE BACKING PAPER
Make sure your pattern is right side up. From the first panel peel and fold 6 inches of the backing paper leaving glue exposed to begin the installation.
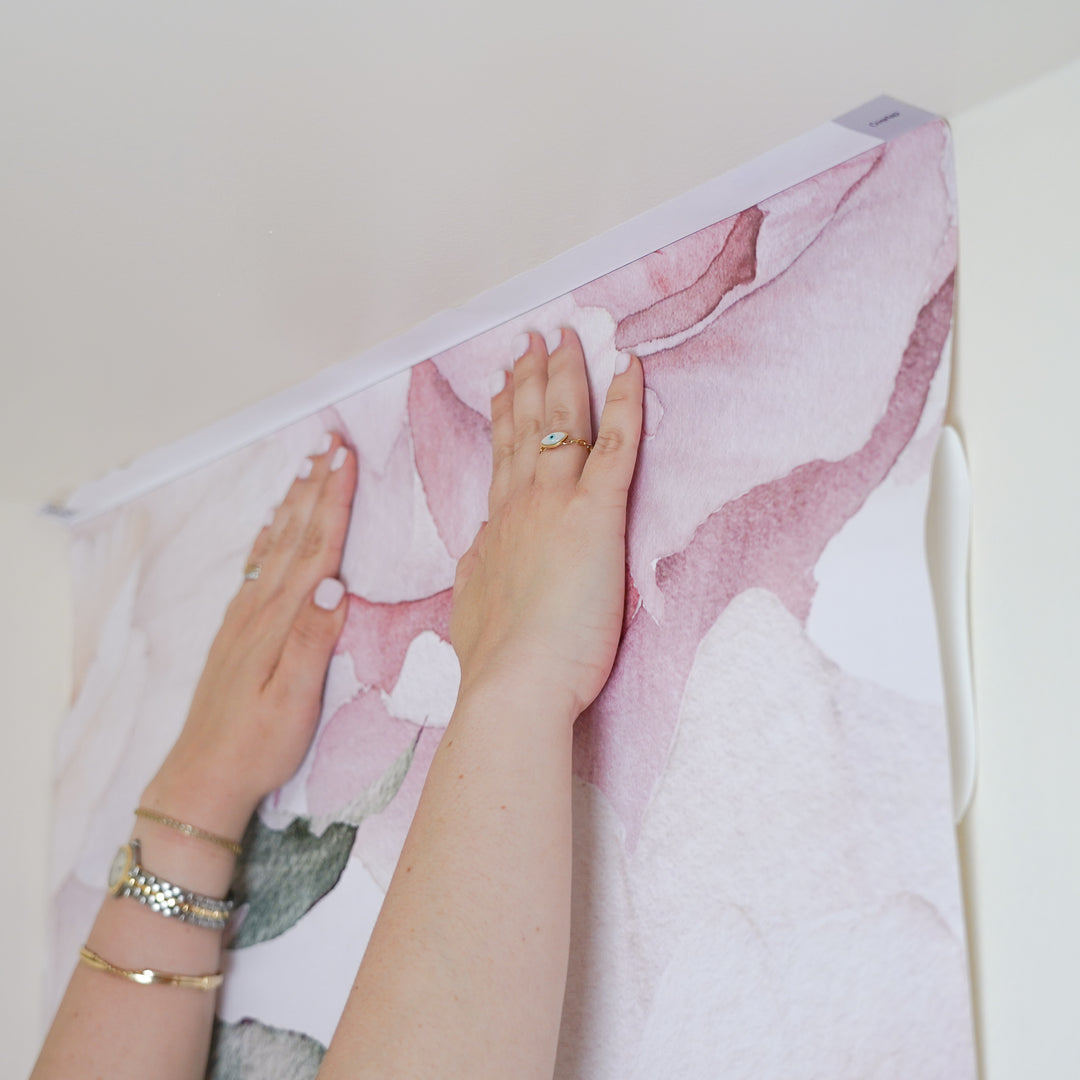
STEP 4: INSTALL THE FIRST PANEL
Apply the panel to the top of the wall, allow a bit of excess to overlap the ceiling. Check if the wallpaper is straight, align the right side with the Guide Line. If not straight lift and repeat this step.
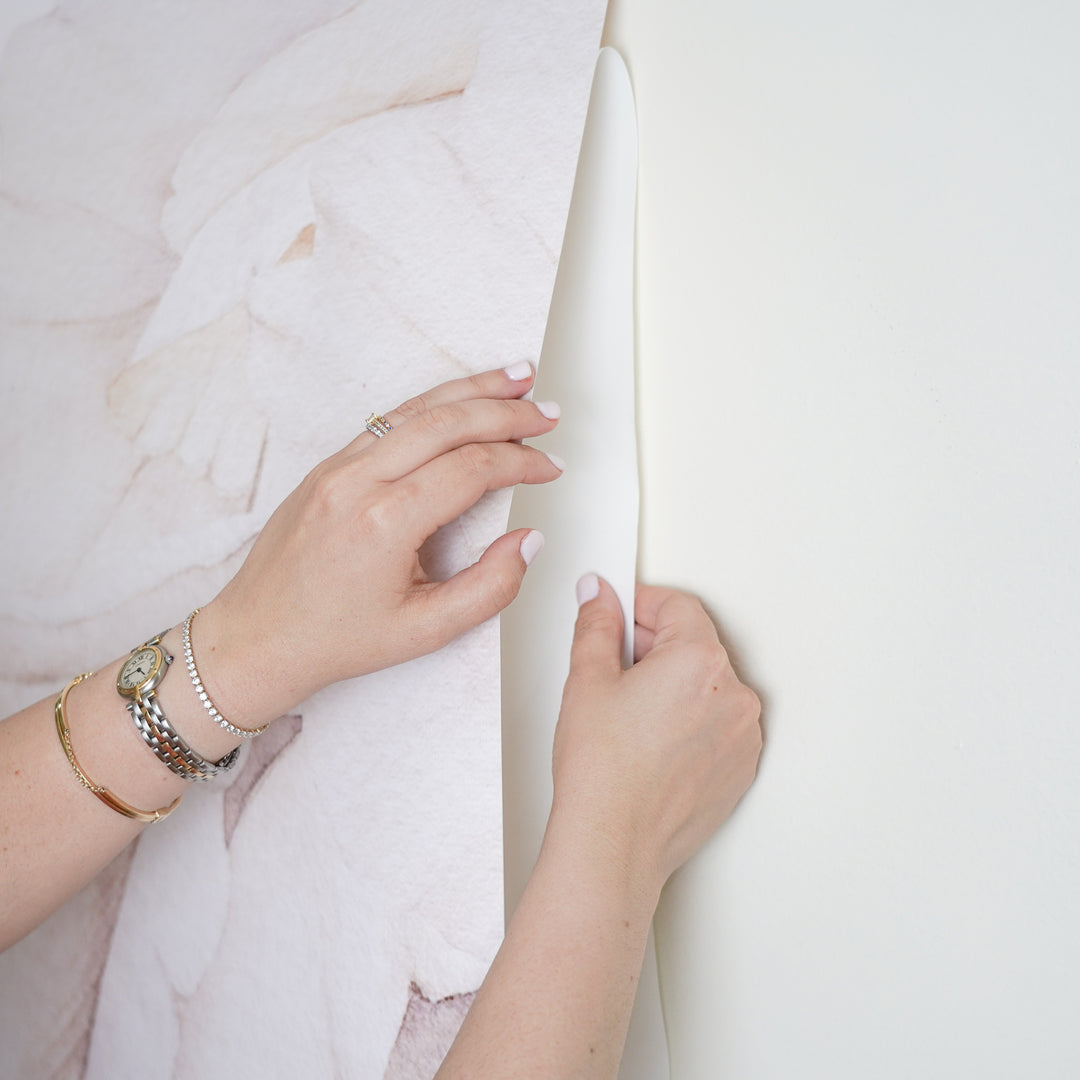
STEP 5: PEEL THE BACKING PAPER LITTLE BY LITTLE
Peel the backing paper little by little no more than 10 inches at a time, checking the right side is matching with the Guide Line. Pull the backing paper down always straight, never in an angled direction as it might stretch the material.

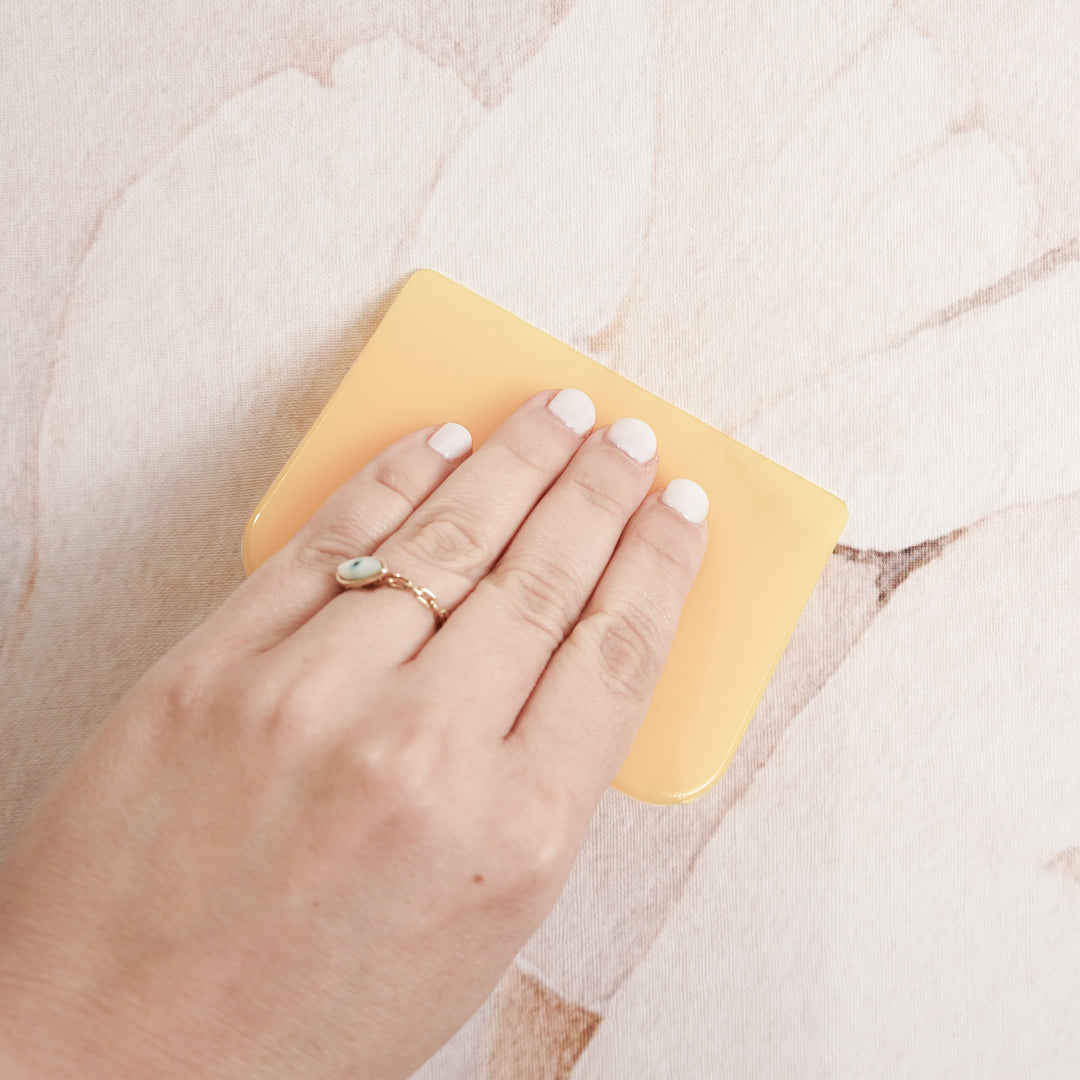
STEP 6: SMOOTH YOUR PANEL INTO THE WALL
Every time you remove a little of the backing paper use the squeegee tool to press firmly the wallpaper into the wall and remove bubbles moving form the center outwards. Using the squeegee is fundamental to stick the wallpaper to the wall. Bypassing this step can cause the wallpaper to fall off shortly after installation.
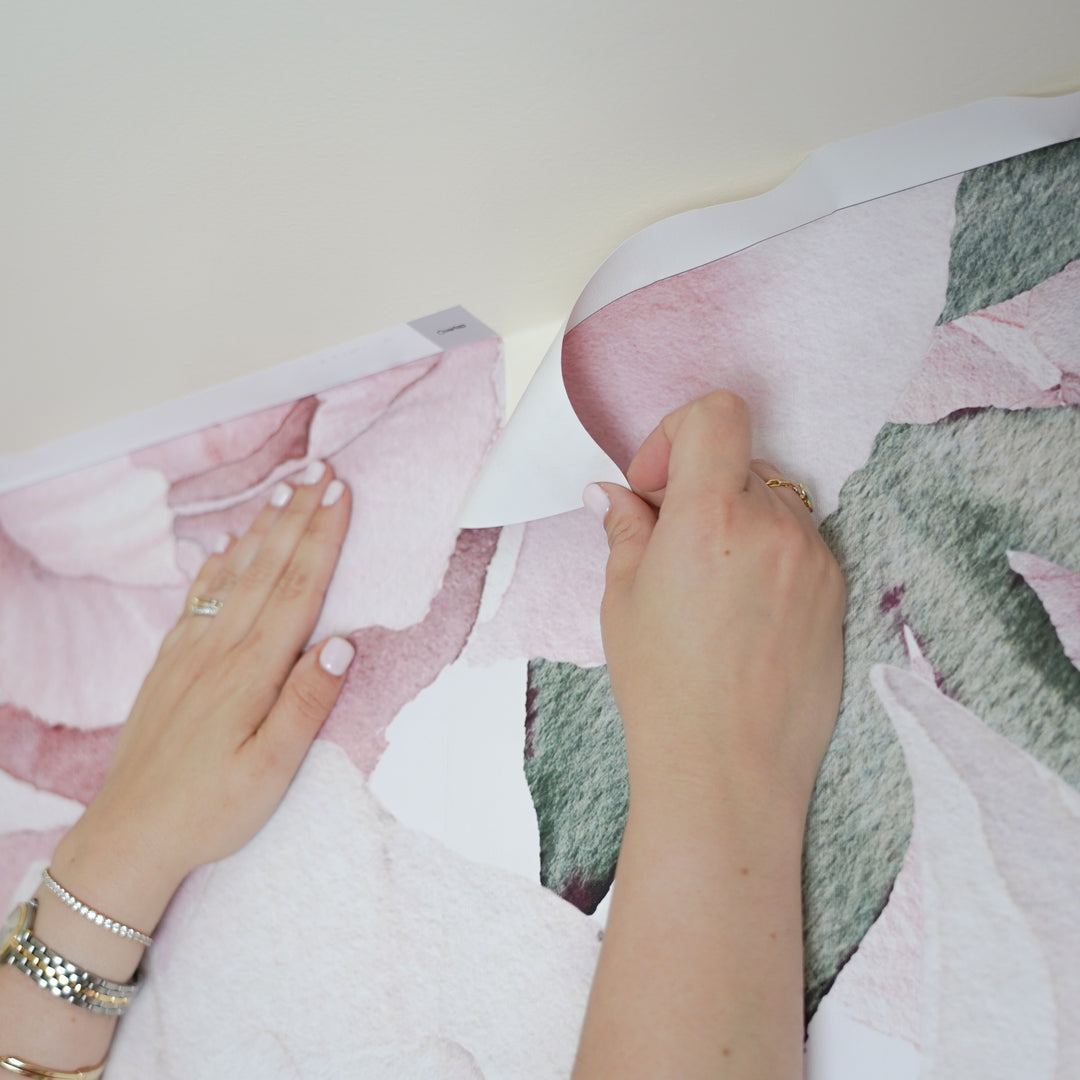
STEP 7: APPLY MORE PANELS
Select your next panel of wallpaper and apply it so that its left side overlaps the right edge of the previous panel matching the repeat. Find a friend to help with the alignment. Using the same procedure apply more panels.
STEP 8: SMOOTH AGAIN
Smooth each panel during installation, and after finishing smooth all the arrangement again. If possible repeat the step a few days later.
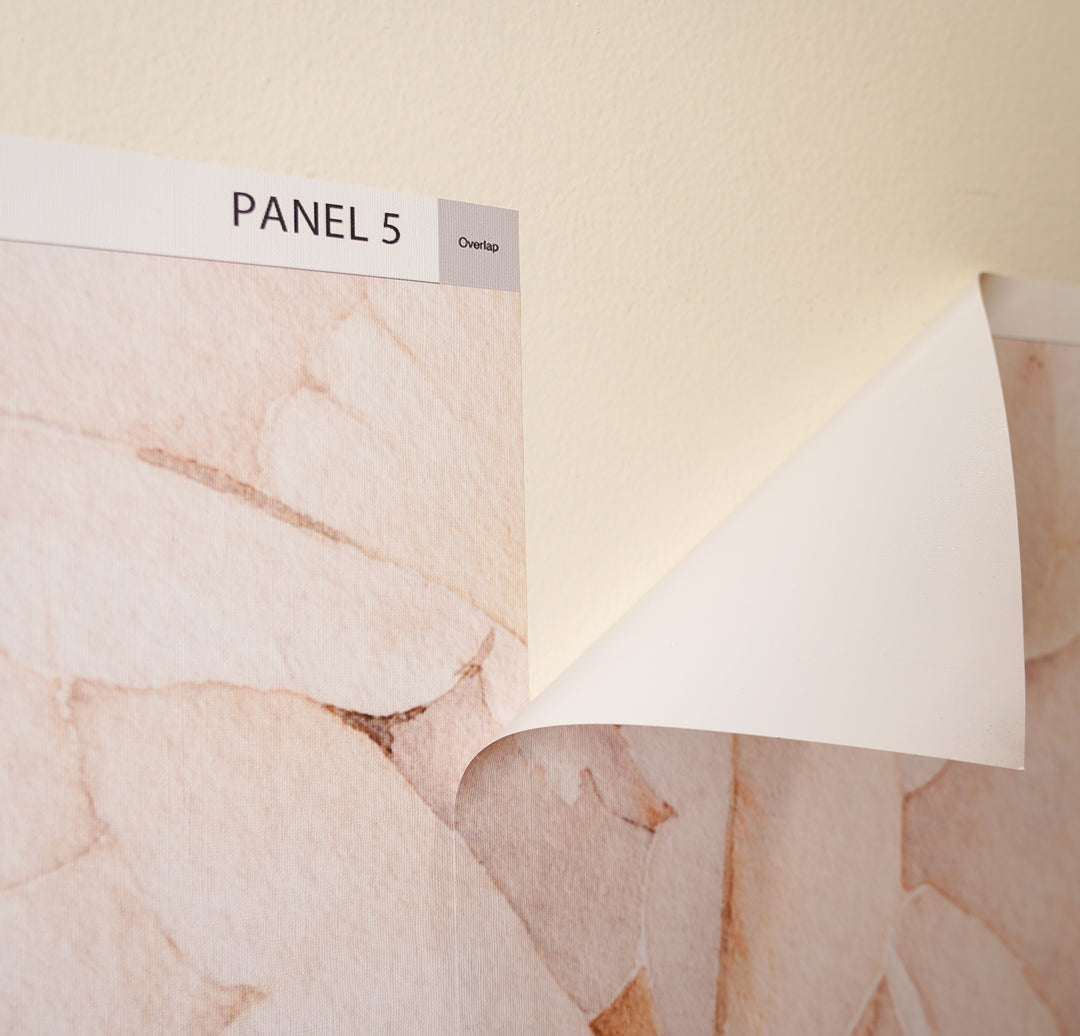
Overlap
All our orders are produced with a Overlap to ensure the quality of our wallpapers.
The "Overlap" sign you see at the top of each one of your panels means the edges need to be superposed for 1 full inch one on top of the other. You will place the next panel 1 full inch over the previous one.
We do not recommend the removal of the overlap for any type of Peel and Stick wallpaper. Peel and Stick wallpapers contract a bit over time. Removing completely the overlap can cause the wall to show through the wallpaper seam some time after installation.
When installing over a texture wall (with a suitable material) do not remove the overlap. It helps maintain the dimensional stability of the whole installation.

TRIM
After installation trim the excess paper along the ceiling and baseboard. Always use a sharp knife to cut, try not to lift your knife when making long cuts.

CARE
Our Wallpapers are washable, to clean them you can use a wet sponge, kitchen towel or damp cloth; use only mild detergents. Don’t use abrasive cleaners & don’t scrub the paper.

REMOVAL
Lift a corner and gently pull firmly, evenly and slowly, working parallel to the surface. If encounter resistance heat the area with a regular blow dryer on the HOT setting to weaken the adhesive and easily remove from surface.
COMMON ISSUES & How to solve them
Removable Peel and Stick wallpapers are not safe when installed over textured walls as they can fall off shortly after installation. Common types of wall textures are: Orange Peel, Popcorn, Knockdown, Slap Brush, Sanded Walls.
If your wall is not smooth to touch, flat and free of any deformation, then it is textured.
We offer an amazing material for textured walls Long Term Peel and Stick, please save yourself from the awful and also dangerous experience.
Measure twice, order once. Measure your wall with a measure tape. Never use a phone app, please just don't. For every wall measured with a phone app we have a customer service inquire and unfortunately the measurement is always short.
When measuring for complex areas it's not about the exact square footage but the overall area to cover. You can read our article How to Measure your Space
ll peel and stick films have stretch rate, millimetric (1-2 millimeters per 8-9 feet tall). The stretching rate of your wallpaper will be exactly the same for all panels. When aligning wallpaper panels during an install you might notice the top matches perfectly but the bottom is 2 mil. off, just trust the process, as you peel the backing paper you will see the misalignment disappear.
When force is applied while removing the backing paper, more stretching rate will be experienced.
The backing paper needs to be removed with both hands in horizontal and parallel position, pulling even with the same tension on both sides, this way you will feel a slight resistance but never the need to pull hard. If you feel the need to apply force, then you are doing it wrong. Never pull the backing paper with just one hand, or favoring left or right directions.
This happens all the time, to pros as well as beginners: You are installing the wallpaper over a wall. There are as many straight and perfect walls as there are walls with small deformations. Many walls have bumps or depressions that are not visible but the problem does come out during a wallpaper install.
If this happens to a DIYer during installation, the wallpaper won't not match or/and creases in some areas even when the Repeat was checked out before hanging it. There is no solution for it other than try to cope with it or abort installation and find a pro to help.
Never pull and try to force the material in place. When this happens you need to place the wallpaper to match at it’s best without pulling and keep installing the rest of the panels. These issues usually happen in small areas on the wall and once the install is finished you will not notice it in the overall project.
Simple and proper alignment is crucial during an install. If your panels are tall, never do it alone, pros go in pairs almost always! In a 8 feet tall panel 1º single degree off at the top will cause half an inch of misalignment at the bottom. Some designs are more easy to manage than others, some look fine even when they are not perfect, other designs need to match perfectly or they will look like the bad intent of a wallpaper. Because this can be a frustrating process if you are detail oriented we recommend to reserve 1 hour per panel to install to have an idea of the patience this step requires.
Need to know: When a removable wallpaper is not attached properly it can take days even weeks before seeing the wallpaper lifting the wall.
Textured wall: Removable wallpapers are not suitable for textured walls and just won't adhere properly.
Low VOC paints: Amazing but unfortunately they are becoming a challenge for wallpaper installations as they can cause the wallpaper to fall off. The exact reason we don’t know since low VOCs formulations are protected by trade secrets. A simple solution for the problem is to clean the wall (recommended 2-3 times) with a mixture of 70% isopropyl alcohol and 30% water, let dry completely, test the adhesion with a sample and afterwards proceed with the wallpaper installation. Some brands that offer low or no VOC (volatile organic compounds) are: Behr, Benjamin Moore, Rust-Oleum, Valspar, Safe Ecoat, Ecopaints. Unfortunately if you do not wash you wall prior installing the adhesive in the wallpaper will get ruined permanently.
Dirty Walls: How much dust is on your walls? It can be a lot! If you did some other renovation at home and you want to finish with a wallpaper just clean your wall!!! Accumulated dust on a wall can for sure damage the adhesive, the most dust the less the wallpaper is going to stick. Installing a removable wallpaper over a dusty wall is to install the wallpaper on the dust not the wall. Bad thing is you cannot remove the dust from the adhesive afterwards.
Recently Painted Walls: If you paint and then you want to wallpaper you also need to wait 4 weeks before applying any peel and stick wallpaper on that wall. Paints keep emitting low grade fumes for weeks after, paint looks dry but it’s not! If you install wallpaper those fumes have nowhere to go, will generate massive bubbles on your wallpaper, the fumes also damage permanently the adhesive on your wallpaper.
Stain Blocking Paints or Primers: Stain blocking paints are formulated to block anything trying to get bonded to it. If you have a stain blocking paint you won’t be able to install the wallpaper, it just won’t stick. We had a customer going through this, the wallpaper pasted on other walls but not the single one intended for the install. Getting a sample and trying it on the wall is the only way to test if you have a stain blocking paint.
Installing on Cracked Paint and Damaged Walls: Wallpapers are intended to protect the wall not to repair it. Wall needs to be in good condition prior to applying wallpapers. As paint flakes adhere to the wallpaper this will ruin it immediately.
Drastic temperature changes: Interior decoration removable wallpapers are susceptible to drastic temperature changes. After some time a wallpaper will become more resistant to those changes but a newly installed wallpaper will for sure suffer.
Covering elements on the wall: Do not use a wallpaper to cover other wallpaper previously installed, our wallpapers are only suitable for painted walls not to repair or cover elements, fabrics of wallpapers previously installed over the wall.
Attaching elements to the wallpaper: All elements you want to hang over a wall with a wallpaper need to be attached to the wall not the wallpaper. Do not paste a frame, baby sign, any type of decor or shelving with double sided tape to a wallpaper. The wallpaper will fall off along with all heavy elements attached.